
Create your own doggie bunk beds!
Don’t have enough room for all those on-the-floor dog beds? Why not build some bunks! And if you’re looking for some help in training your dog to go to their new bunk bed, please check out the positive-methods training video I made with my friend Paul Owens, the Original Dog Whisperer.

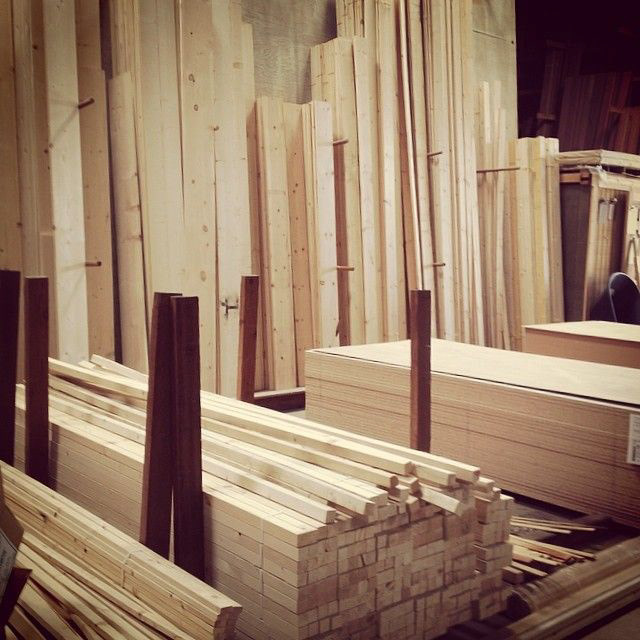
Step 1: Gather Your Materials and Tools
Shopping list:
1 @ 8′ 1×6
1 @ 6′ 1×6
1 @ 6′ 1×3
1 @ 10′ 2×6
2 @ 10′ 2×2
1 sheet of 7/16″ OSB (if possible, get it cut when you buy it–you’ll need 2 pieces at the dimensions of your beds minus 3/8″–in my case, 2 @ 26 5/8″ x 35 5/8″)
1 1/4″ pocket hole screws (if using a Kreg Jig) or #10 biscuits (if using a biscuit joiner)
2″ wood screws
1″ finishing nails or wood screws
120 grit sandpaper
wood filler
wood glue
finish of choice (wood conditioner/stain/poly or primer/paint)
brush(es) and/or rags.
For the actual bed part, I bought two of these: American Kennel Club Solid Suede Gusset Pet Bed with Fur Top and the dimensions are 36″ wide x 27″ deep so that is the size of beds these plans are designed to fit. If you already have dog beds or are buying beds of a different size, adjust the measurements to fit your beds.**EDIT** The AKC dog beds are cr@p. I washed one cover and it fell apart. I also tried the Molly Mutt dog bed duvet and stuff sack in size Medium/Large. I loved the idea of putting my old clothes into it because the clothes smelled like me and would hopefully calm my dog while I was away. But that one also didn’t last. Finally, I got the PetFusion Ultimate Dog Lounge in size Large and they are perfection. I got them over a year and a half ago and they are still in GREAT condition. So easy to remove the cover for washing and fits perfectly. Love.
Step 2: Cut Your wood
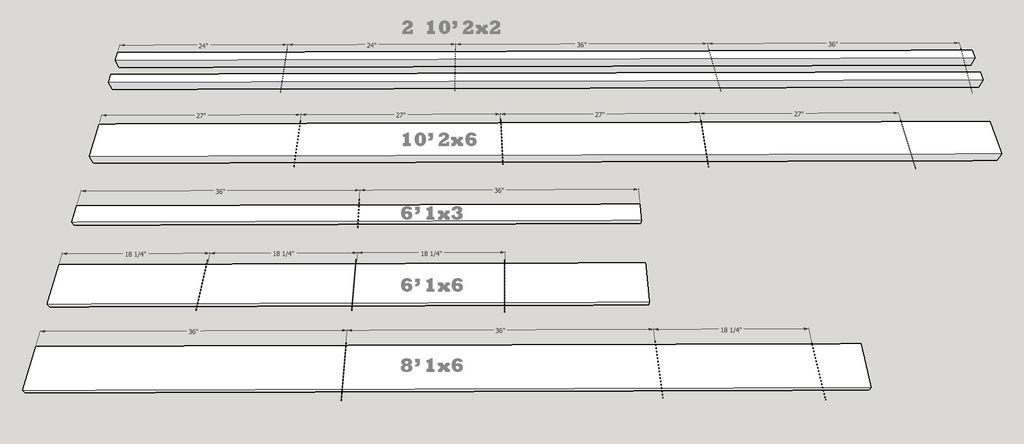
To get the most bang for your buck, cut your dimensional lumber as shown above.
Cut list:
2 @ 36″ 1×6 (backs- add or subtract depending on your bed size, this is for a 36″ wide bed)
2 @ 36″ 1×3 (fronts – add or subtract depending on your bed size, this is for a 36″ wide bed)
4 @ 18.25 1×6 (sides – add or subtract depending on your bed size, this is for a 27″ deep bed)
4 @ 2′ 3″ 2×6 (legs – this height or whatever height you want)
4 @ 36″ 2×2 (side cleats)
4 @ 24″ 2×2 (front/back cleats)
2 @ 26 5/8″ x 35 5/8″ 7/16″ OSB (bases – add or subtract depending on your bed size, this is for a 27″ deep x 36″ wide bed)
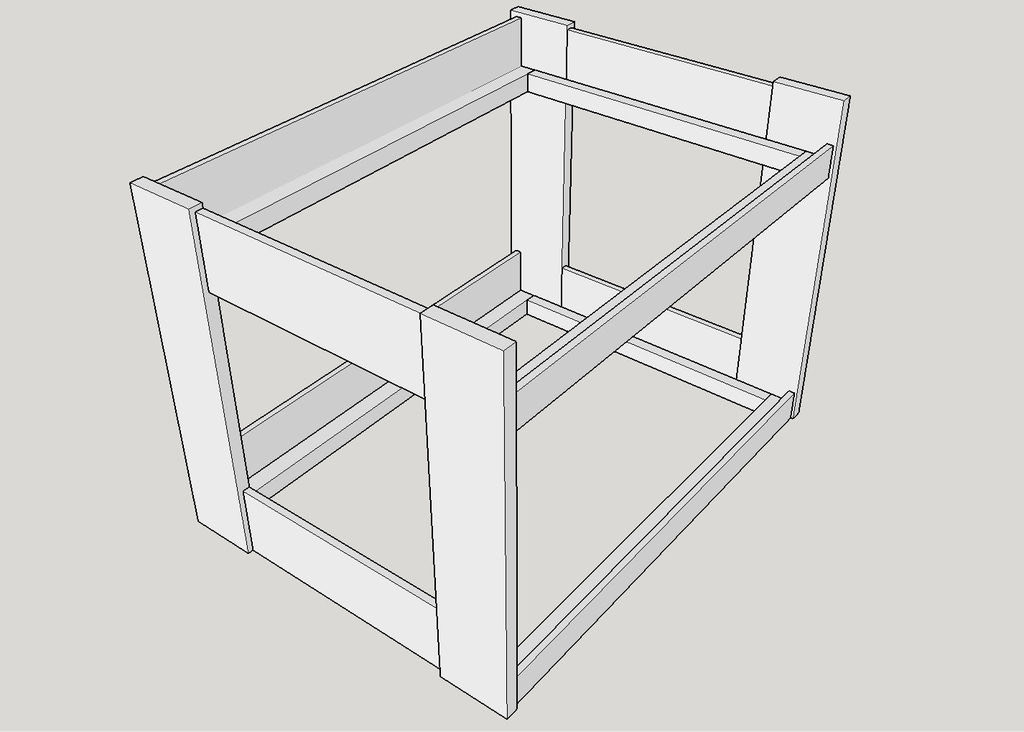
Step 3: Build the Sides
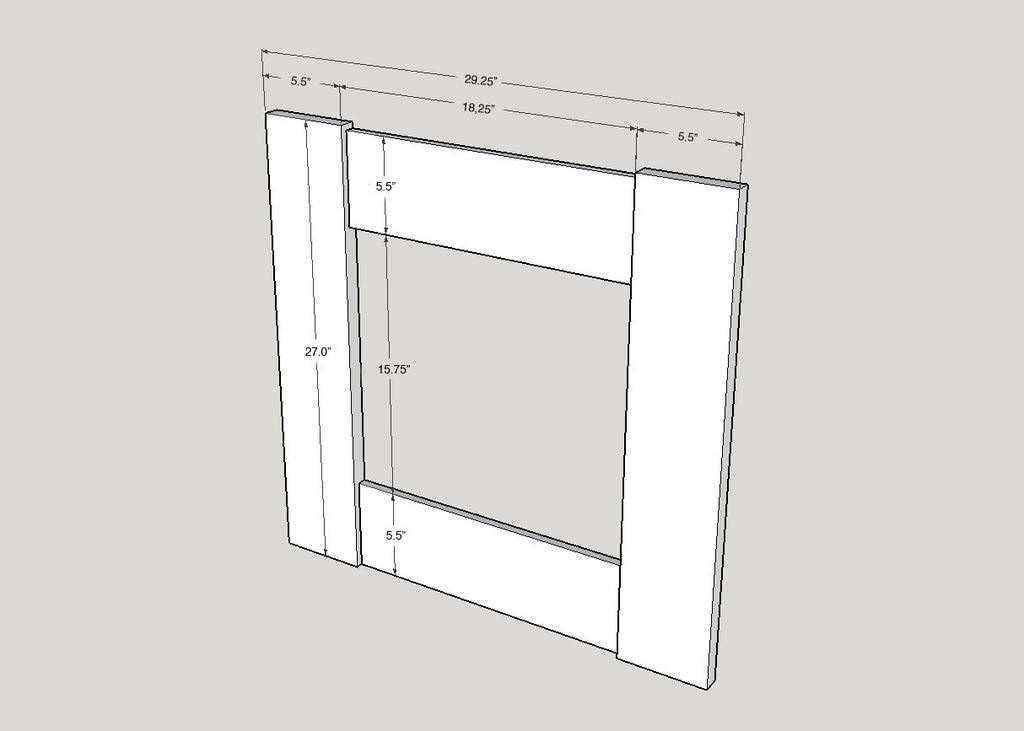
You will need to build two of these sides:
1. Build the sides of the bunk bed as shown in the diagram with 27″ 2×6 legs (or however tall you want the beds to be) and 18 1/4″ 1×6 aprons (change if your bed is different than 27″ deep).
2. Top aprons should be about 1/4″ shy of the top of the legs, and bottom aprons flush with the bottom of the legs.
3. Both aprons should be flush with the legs on the inside.
4. Attach using biscuits and wood glue, or pocket holes set for 3/4″ stock using 1 1/4″ pocket hole screws.
If you don’t know how to join wood using a Kreg Jig, there is a good tutorial here:
http://www.prettyhandygirl.com/how-to-use-a-kreg-jig/.
http://www.prettyhandygirl.com/how-to-use-a-kreg-jig/.
Step 4: Add Front and Back Aprons
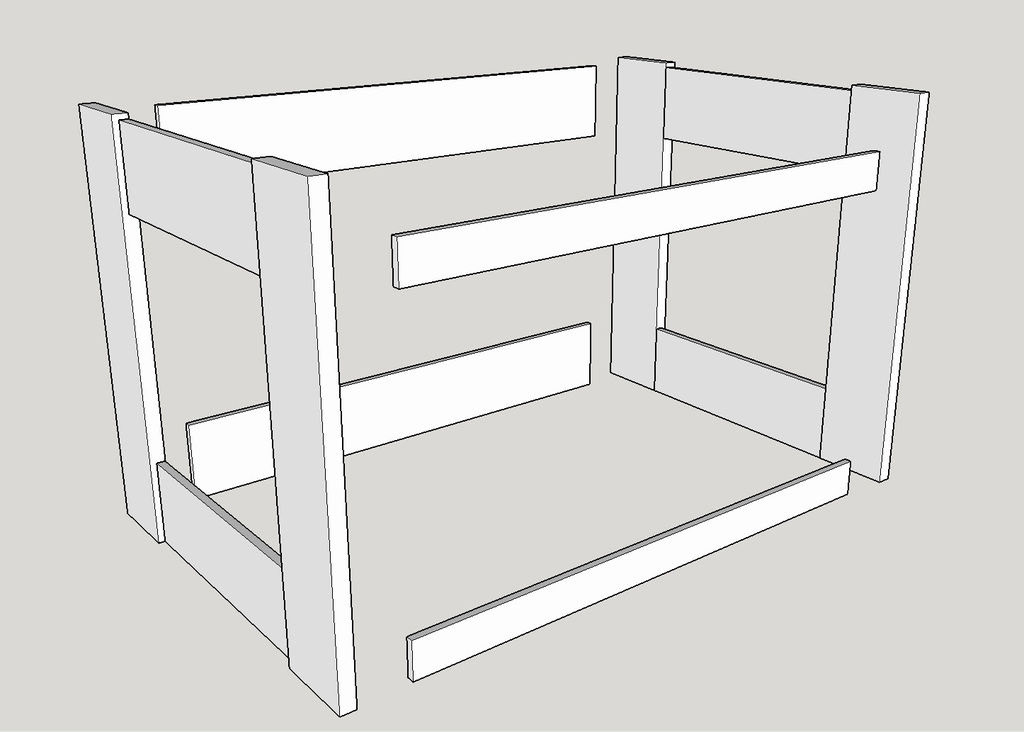
You will attach the sides you just made to each other using the front and back aprons:
1. Attach the 36″ 1×3 front aprons and the 36″ 1×6 back aprons to the side aprons as shown above.
2. The bottom of the front and back aprons should be level with the bottom of their adjacent side aprons.
3. There should be 27″ between the front and back aprons to allow for the plywood.
4. Use biscuits and wood glue or pocket holes set for 3/4″ stock using 1 1/4″ pocket hole screws.
Step 5: Attach the Cleats
This creates the base on which the plywood will sit:
1. Use glue and 2″ wood screws to attach the 24″ (sides) and 36″ (front and back) 2×2 cleats as shown above. (The length of the cleats does not have to be exact. I used some 16″ 2×2’s and a couple of 1×3’s as cleats for mine because I had extra lying around.)
2. If your cleats are shorter and don’t go the full length of the inside, center the cleats on each apron.
3. The bottom of the cleats should be flush with the bottom of the apron to which it is attached.
Step 6: Finish It Up

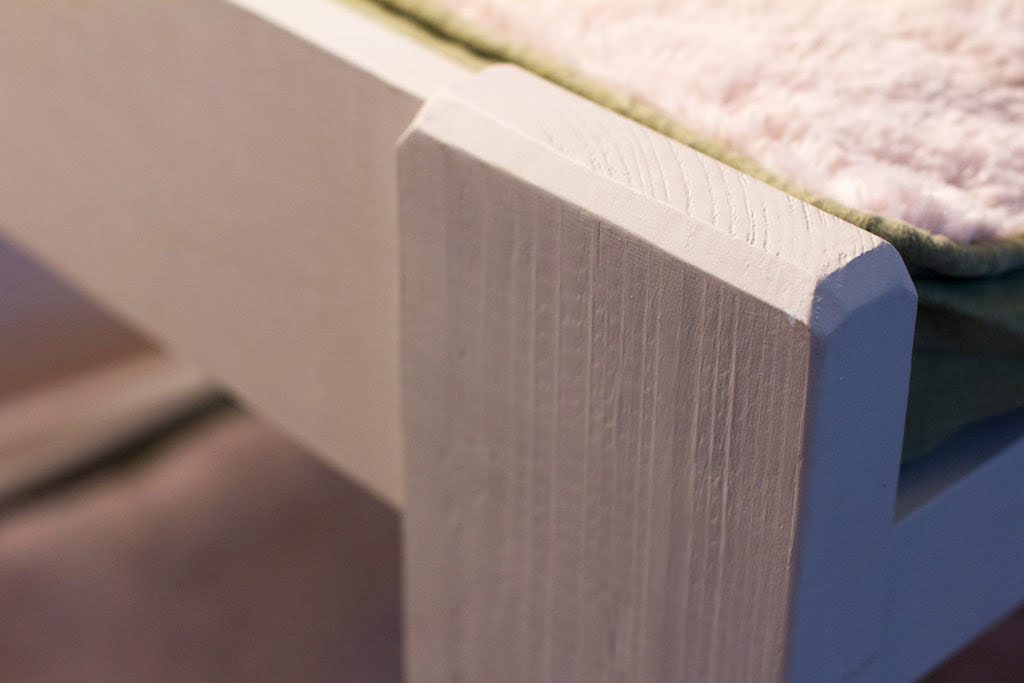
I primed and painted my beds but you can also stain and poly to keep the wood showing:
1. Fill all holes with wood filler and let it dry.
2. Add more coats of filler if needed, and sand smooth when dry with 120 grit sandpaper in the direction of the wood grain.
3. Clean surface of all sawdust, then finish with sealer/stain/poly or primer and paint.
1. Fill all holes with wood filler and let it dry.
2. Add more coats of filler if needed, and sand smooth when dry with 120 grit sandpaper in the direction of the wood grain.
3. Clean surface of all sawdust, then finish with sealer/stain/poly or primer and paint.
Step 7: Insert the Plywood
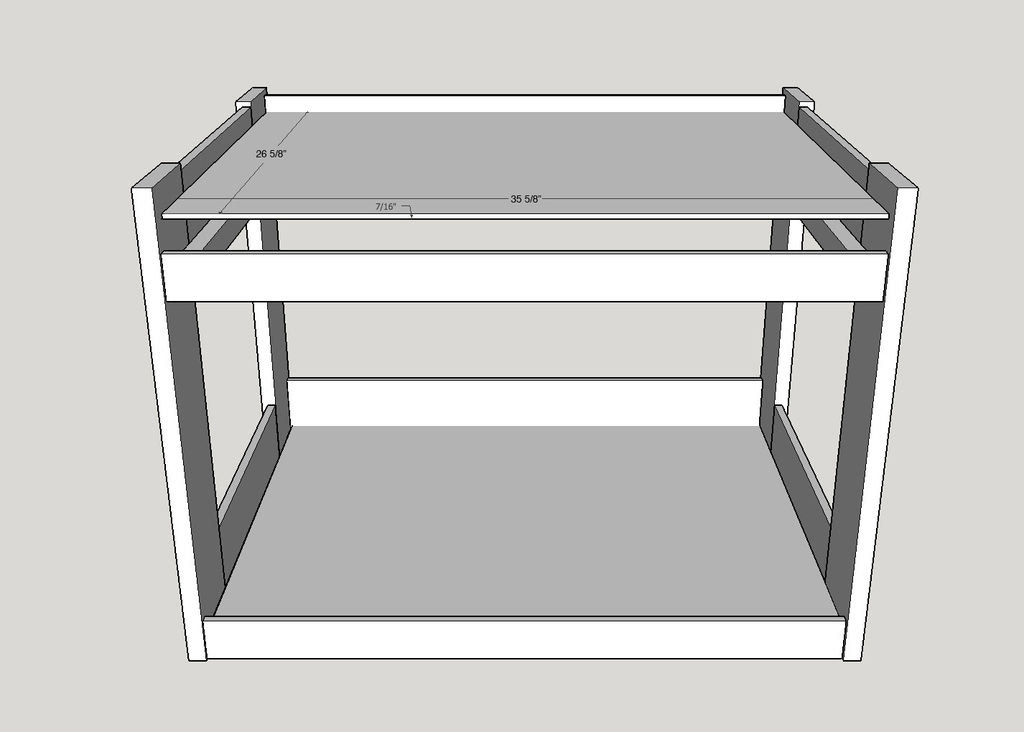
Here are your final steps:
1. Drop in the plywood bases and then attach them to cleats with either 1 1/2″ finishing nails or 1 1/2″ screws. (Note: once the plywood is secured in place, it’s hard to make any changes to the beds.)
2. Put the beds on top of the plywood bases and enjoy!
3. If the top bed moves around when your pup jumps onto and off of the bed, you can add velcro to keep the top bed secure.
2. Put the beds on top of the plywood bases and enjoy!
3. If the top bed moves around when your pup jumps onto and off of the bed, you can add velcro to keep the top bed secure.
Step 8: Enjoy!
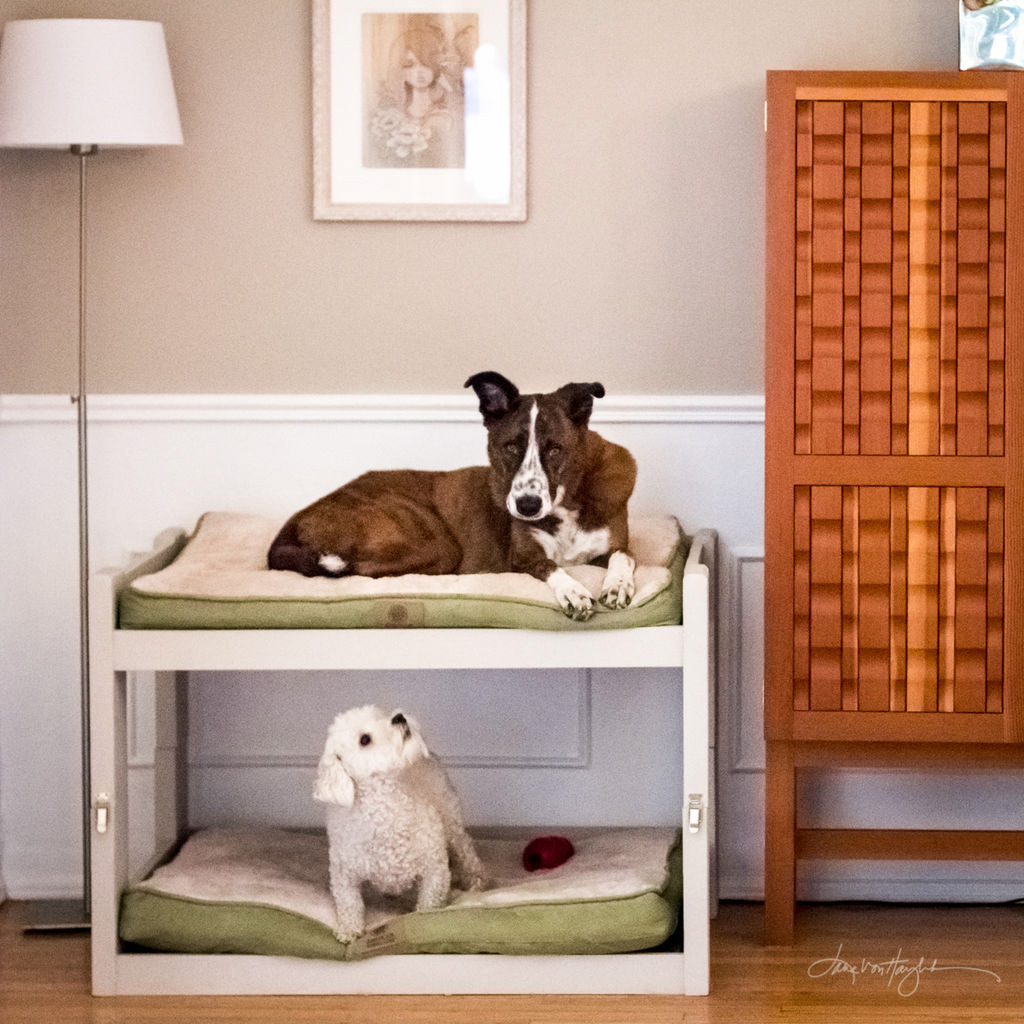
Larry on top, Buster on the bottom. (Buster would probably like to be on the top bunk since he’s the boss, but his little legs are too short. Maybe I’ll attach a rope ladder for him.)