
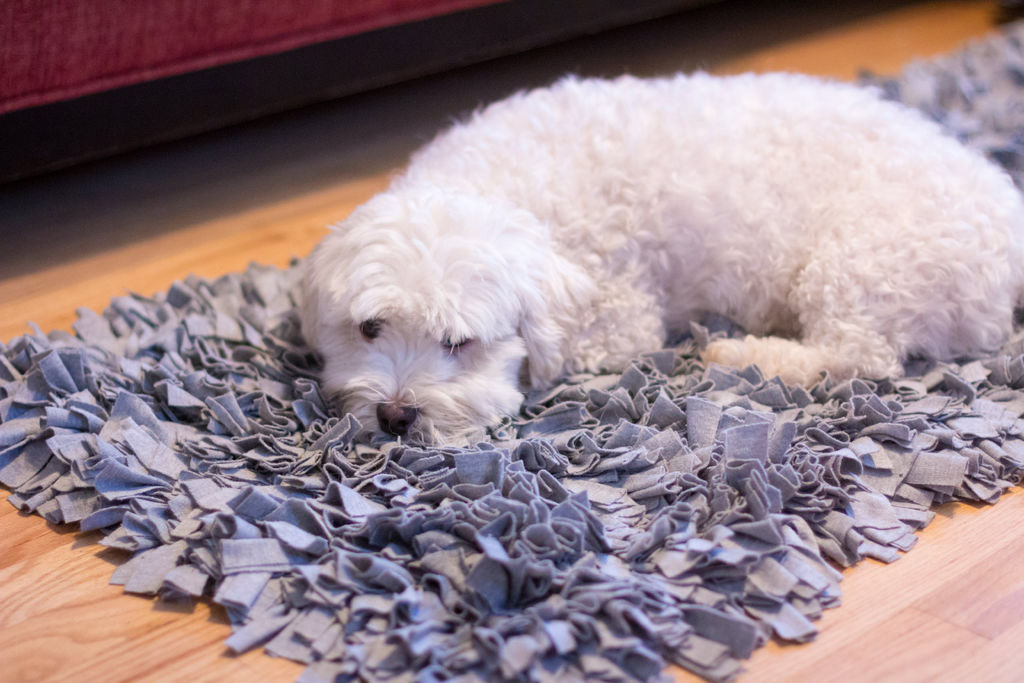
Rugs are soooo expensive, and often don't come in the exact size or color you want. If you are like me and enjoy winding down at the end of the day with a mindless, repetitive project, this is perfect for you ... it's a lot like knitting, very relaxing. And at the end you have a cool, soft, shag rug to enjoy! So easy to make, it just takes a bit of time.
Step 1: Gather Your Materials
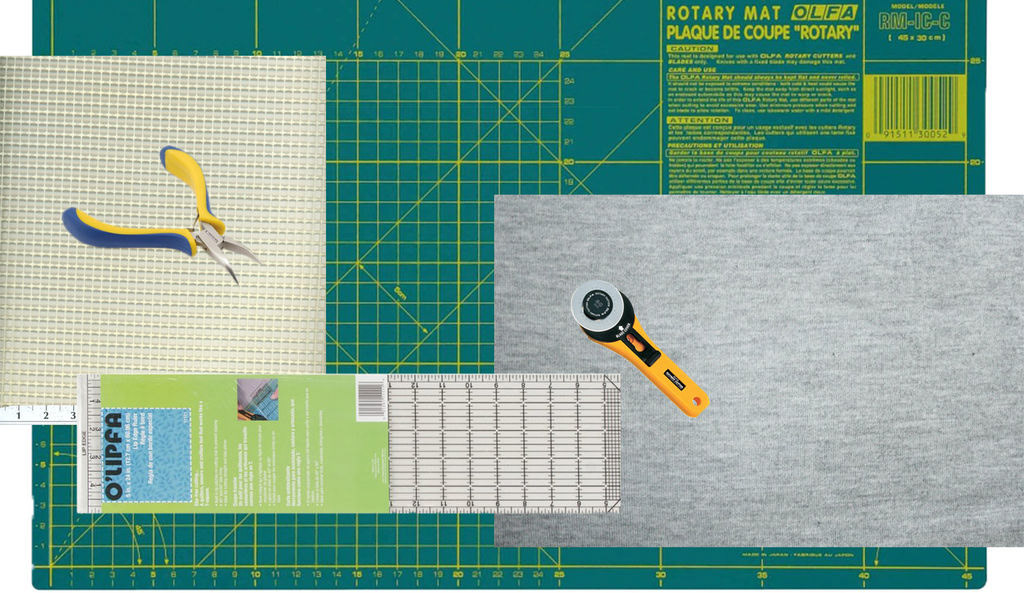
I found the quickest and best way to make this rug is with the following tools and supplies, but I'm sure that any variation will work just as well and you can improvise with what you may already have on hand:
1. Bent-nose pliers - I bought these Beadalon Bent Chain Nose Pliers, Ergo Style for making jewelry a couple years back and they work perfectly for making these rugs as well
2. Utility fabric rug liner - you can buy it by the yard at Joann's for around $7/per, 1/2 off with a coupon. You do NOT want to get the non-slip rug pads, they are not strong enough and will not work.
3. Jersey fabric - I use Joann's Sew Classic Knits Solid Interlock fabric because it's not too thin, has some stretch and will curl just a little. The amount of fabric you buy depends on the size of rug you want to make. If you do it the way I'm showing you, 8 yards of fabric will get you about 2 1/4' x 3' of rug, so if you buy 1 yard of the rug liner (54" wide), you will need 16 yards of fabric to cover it (3' x 4.5' finished size)
4. Rotary cutter - I inherited an OLFA 9653 RTY-3/G 60mm Straight Handle Rotary Cutter from my mom, so that's what I use. It cuts through 4 layers of the fabric and that's a good thing.
5. Rotary cutting mat - It needs to be at least 2' x 3'. I inherited the OLFA 9891 RM-MG 24-Inch x 36-Inch Self-Healing Double-Sided Rotary Mat and it's awesome.
6. Lip edge ruler - I inherited this O'Lipfa 5-Inch-by-24-Inch Lip Edge Ruler and it's the perfect size for the job.
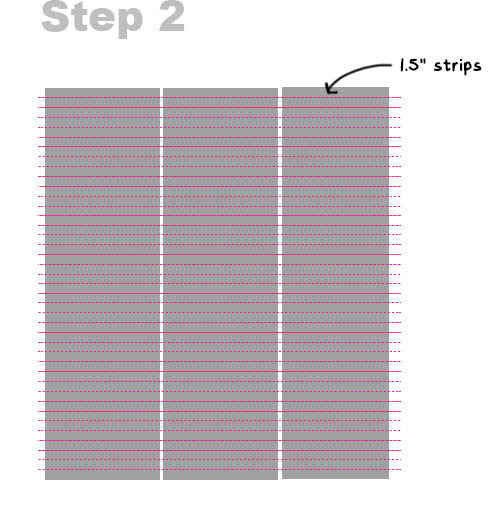
Step 2: Cut Your Fabric
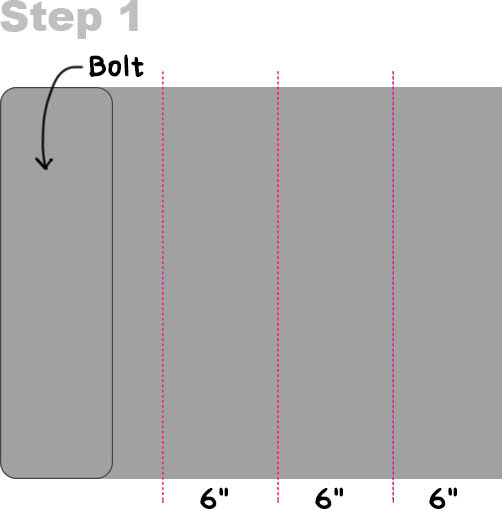
Your fabric will be folded in half already, so double that up and put it flat on your cutting mat so you are cutting through four pieces of fabric.
If you have the mat I have (2' x 3') position the mat horizontally and cut 3 6" widths horizontally. Then cut those into 1 1/2" strips perpendicularly.
Separating the strips from each other makes it easier when you start to knot the rug, so I did that at this stage. Then you can either:
1. Throw them in the washing machine to get them wet, then in the dryer to dry them off. This will get them to curl a little bit; or
2. Skip step one and go right on to the next step.
Step 3: Section Your Rug Liner (optional)
You can cut the rug liner into smaller sections if you want, then just tie the finished sections together at the end to make one big rug. This makes knotting the rug a little easier and also allows you to untie one section of rug and throw it in the washing machine if it gets dirty. You can also change a big area rug into two runners (or vice versa) later if you want to.
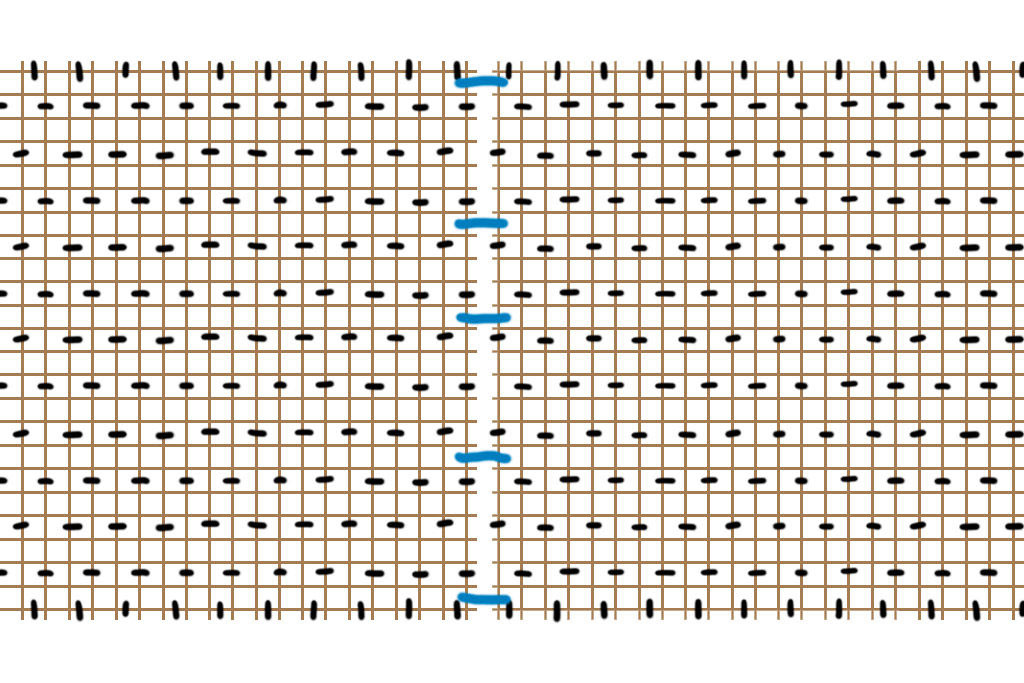
Step 4: Where to Put Your Knots
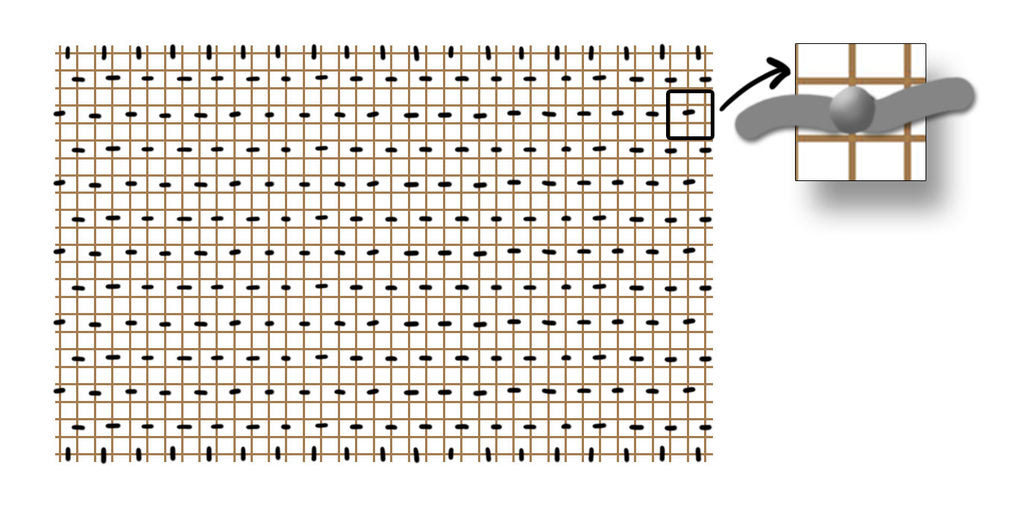
I found that for the rug edges to look right, the edges should be knotted so the ends are facing out. Also, because the strips are wide-ish, not every row and column needs to be knotted. Look at the diagram above to see how I did mine which resulted in the rug in the main photo.
Step 5: Knot Your Rug